
How to improve Email Deliverability in Salesforce Lightning
The Problem
A Social Enterprise had recently started using Salesforce and requested support from Tonica to streamline processes and build in automation. One of the most important issues was ensuring that Salesforce could send email that reached people’s inboxes and looked right when it arrived.
The Solution in a nutshell
Why are Salesforce emails going into Spam? When Salesforce sends email on behalf of your domain it can look like spam, there are three solutions to this:
- Create a DKIM for your domain
- Create an SPF record for your domain
- Integrate Salesforce with your Gmail or Outlook account
The rest of this blog post is a detailed overview of the issues, step by step instructions on how to implement these solutions and things to be aware of. In June 2021, Salesforce Ben published a detailed article written by Paul Ginsberg which discusses some of these techniques and also includes instructions on how to introduce DMARC – see Ensure Emails Sent from Your Salesforce Org are Delivered for another useful resource in addition to this blog.
Improving Deliverability when Salesforce is Sending the Email
There were two main steps to improving deliverabilty when Salesforce was sending out email – creating a DKIM key and adding SPF. I tested out all the solutions using my own instance of Salesforce and my own Gmail for Business (G Suite) account and have prepared this blog post to help others facing the same decisions.
What is DKIM? Thanks to ActiveCampaign for this simple explanation.
DKIM is a “signature” any sender can apply to their email messages. This signature makes clear that the purported sender of the message is actually the sender of the message. Any domain can be used as the “signature.” For example, a company called Example will sign their messages with the Example.com domain to confirm that the message was actually sent by Example. This is accomplished by inserting a hidden, cryptographic signature into your email header and then placing a public key on your website that verifies the authenticity of this signature.
Step 1: Creating a DKIM Key
As at July 2019 this was a fairly simple process which involved following this Salesforce help article on DKIM. Pasted below are the instructions from Salesforce with a few of my additions and observations as well as some screenshots:
- If your Salesforce org was created before Winter ’19, enable the critical update. From Setup, enter Critical Updates in the Quick Find box, and then select Critical Updates. For Enable Redesigned DomainKeys Identified Mail (DKIM) Key Feature with Increased Email Security, click Activate.
- From Setup, enter DKIM Keys in the Quick Find box, and then select DKIM Keys.
- Click Create New Key.
- Select the RSA key size – I chose 1024
- For Selector, enter a unique name, I chose tonica
- For Alternate Selector, enter a unique name. The alternate selector allows Salesforce to auto-rotate your keys. I chose Tonica1
- Enter your domain name. I entered tonica.co.uk
- Select the type of domain match you want to use. As I don’t have any subdomains I selected Exact Domain Only for this. The details looked like this:
 Then click Save. Salesforce publishes your TXT records to DNS. Your CNAME and alternate CNAME records appear on the DKIM Key Details page when the DNS publication is complete. It can take time for DNS publication to finish.
 - Publish the CNAME and alternate CNAME records to your domain’s DNS. This part of the instructions involves logging into your Domain Provider. Your Domain Provider is normally the company you registered your Domain with – for example, Domain.com, Fasthosts, GoDaddy, 123Reg etc. As a Salesforce Admin you might not have access to this so ask IT or the person who set the domain up either to edit this for you or ask them for login details so you can make the changes yourself. N.B. Making any changes to your DNS settings can affect your company’s website, email etc. so ensure you don’t delete or change important records that are already there.
- I did a practice run for the client on my own Salesforce account and domain – I host my domain with 123Reg so logged in there and added the CName record. I pasted the text from Salesforce but when I pressed Save 123Reg stripped out the domain (tonica.co.uk) at the end of the DNS entry name – I noticed on forum posts this had caused people problems before with other sites like GoDaddy so you may need to remove the domain yourself.
- So my 123Reg ‘Advanced DNS’ page now had entries like this:
 Salesforce then advises you to wait 12 – 24 hours before you are able to Activate the DKIM in Salesforce – the Activate button will remain greyed out until the CNAME records are recognised as being correct for your domain. In reality the button was only greyed out for me for about 5 – 10 minutes and then I could press the Activate button in Salesforce.
 - When Salesforce has recognised your CNAME changes and Activate is no longer greyed out, you can select Activate on the DKIM Key Details page in Salesforce.
Step 2: Creating an SPF Record
SPF records are public records on your website that authorize certain servers to send mail with your domain. Various blogs and articles suggest that even with DKIM, you should also add an SPF record to your domain. I couldn’t find a really simple explanation to how to do this online even though there were Salesforce help pages and other blogs. The solution is simple. When you login to your domain provider you should see an entry which looks a bit like this:
v=spf1 include:_spf.google.com ~all
Make sure you take a copy of what was there originally before making any changes – just in case you need to roll back to before your changes. I use GSuite which is why there is an SPF record permitting Google to send out email on behalf of Tonica.co.uk. It is not good practice to set up multiple SPF records per domain – what you need to do is edit the existing one to add the new domain that you’d like to send out email on your behalf. In my case this involved adding the Salesforce address to make an entry like the following:
v=spf1 include:_spf.google.com include:_spf.salesforce.com ~all
So my entry looked like this on 123Reg:

While you’re editing the SPF record, have a think about whether you need to add any other domains – for example, you may want to add Form Assembly if you’re planning to use that to make your SPF record look like this:
v=spf1 include:_spf.google.com include:_spf.salesforce.com include:spf1.formassembly.com ~all
Make sure that you don’t have a space between the include: and the next part as that will generate an error.
At this point you can copy and paste this SPF record into www.kitterman.com and it will check that it’s valid – just copy it into the SPF record box under ‘is this SPF record valid’ and then click Check SPF record. After you’ve updated your SPF record it will take time to propagate through – we’re told that it can take up to 48 hours, but in my experience, if it hasn’t updated in a couple of hours, then something is probably wrong. You can check what SPF records are on your domain by using the MXToolbox ‘SuperTool’ (currently in beta) – just type in your domain and select SPF and it will show you the SPF for your domain.
The Result
After waiting over 12 hours I headed over into Salesforce, clicked a contact, selected the Email tab from the Activity box on the right hand side and sent a test email. When you test your changes you need to send tests to both the same domain (e.g. yourself) and a different domain (e.g. your personal email address or testing email address under something like gmail.com). This is the result:
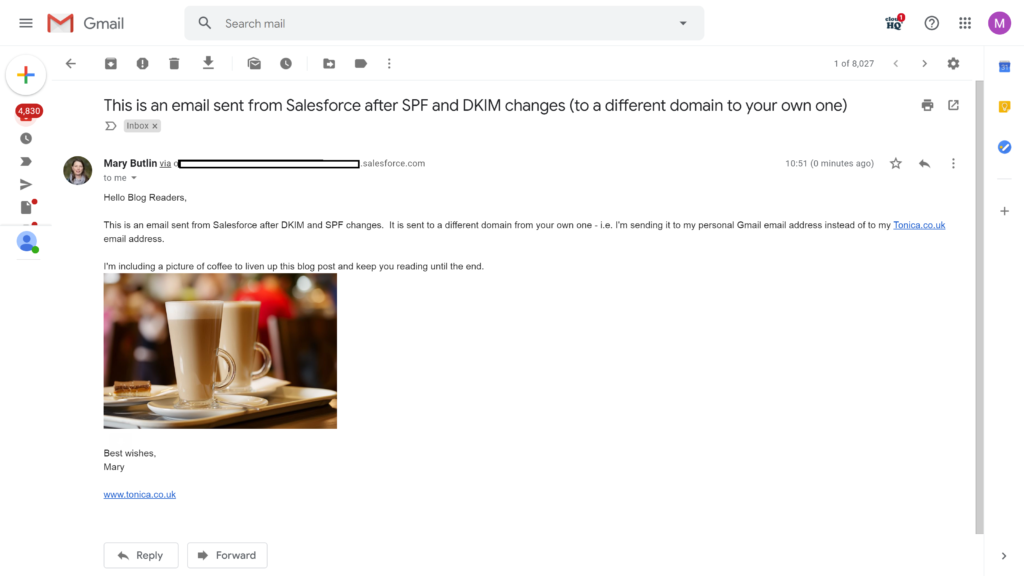
Sending to a Different Domain
This email was received to the inbox and wasn’t flagged as suspicious which was reassuring. However it did include the ‘via xxxxxxx.salesforce.com’ in the From field when viewed on a desktop or laptop.
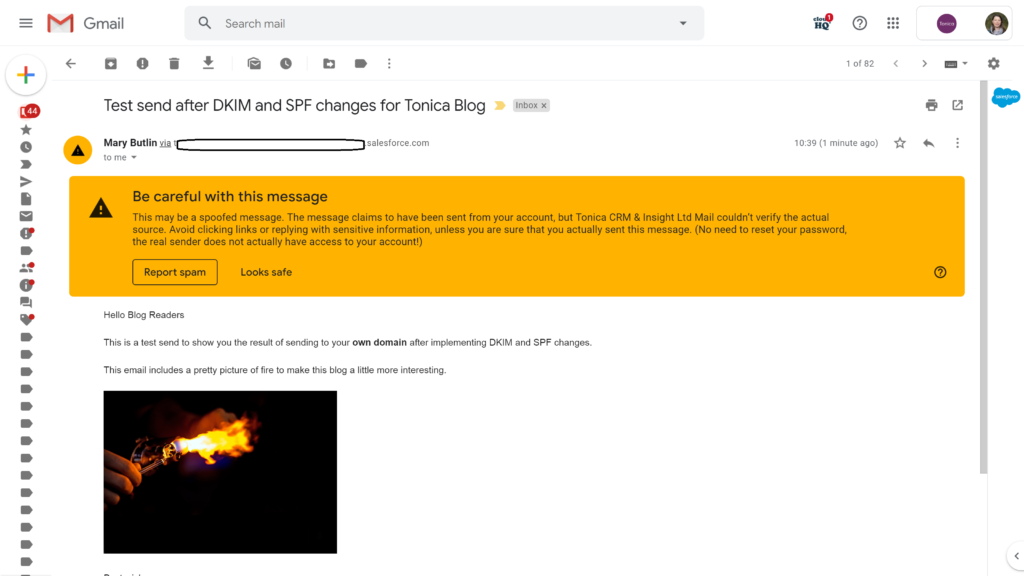
Sending to the Same Domain
When sending to your own domain, it is marked as a ‘spoof email’ by gmail, even after DKIM and SPF changes.
So far so good … kind of
So with the DKIM and SPF changes we’ve made, emails sent to external parties are looking good but I personally don’t like the ‘via ……Salesforce.com’ from address when viewing these emails on a laptop or desktop (this doesn’t show up on a mobile). I think it looks messy and I also don’t like that emails sent to your own domain (i.e. internal emails) look spammy – there is probably a relatively easy fix to this, for example I’ve read that you can whitelist the Salesforce IP addresses and make other changes and that will probably help.
What will fix these things entirely?
So there are some potential solutions to get rid of the ‘via ….. salesforce.com’ – for example, some blogs/articles suggest that disabling email tracking gets rid of this. I tried disabling email tracking and still ended up with the same issues of the ‘via’ from when sending to a different domain, and the ‘spoof’ message when sending to my own domain.
To save the ‘spoof’ message when sending to your own domain, it’s possible that whitelisting Salesforce email addresses can improve this situation. Let me know if this change worked for you.
What solution did we choose?
Despite all of the above changes, we opted for sending email from Gmail instead of from Salesforce. This had the advantage of removing the ‘via ….salesforce.com’ in the from field and also removing the ‘spoof’ message when sending to our own domain. It also had a key advantage that we could see all of our sent emails in the Gmail account the same way as we could view other sent emails – this will be very helpful when we are developing automation using Process Builder.
I still think it is worth making the DKIM and SPF changes in case you rely on sending from Salesforce in the future, or a user forgets to change their Email Settings to send from Gmail.
How did we send email from Gmail instead of Salesforce?
This is a two stage process:
1) First ensure your organisation is integrated with Gmail
There is a gmail integration trailhead which outlines how to integrate gmail with Salesforce. There is also a Salesforce help article for setting up the Gmail integration. Essentially there are two steps to this – first search for Gmail Integration And Lightning Sync in Set Up and then switch on Gmail make sure Use Enhanced Email with Gmail is also on (when you click the expand button), then search for Send through External Services and ensure the Gmail toggle is on.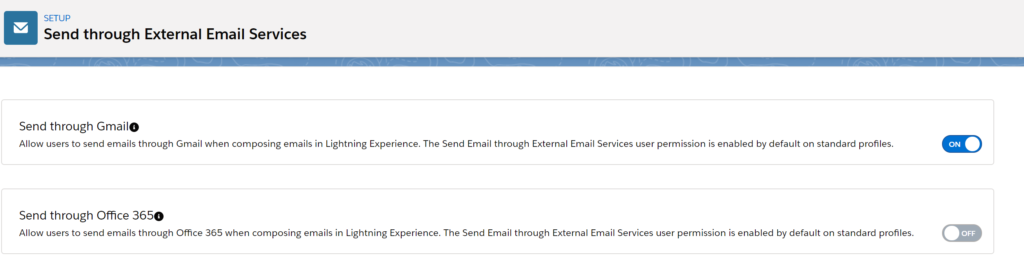
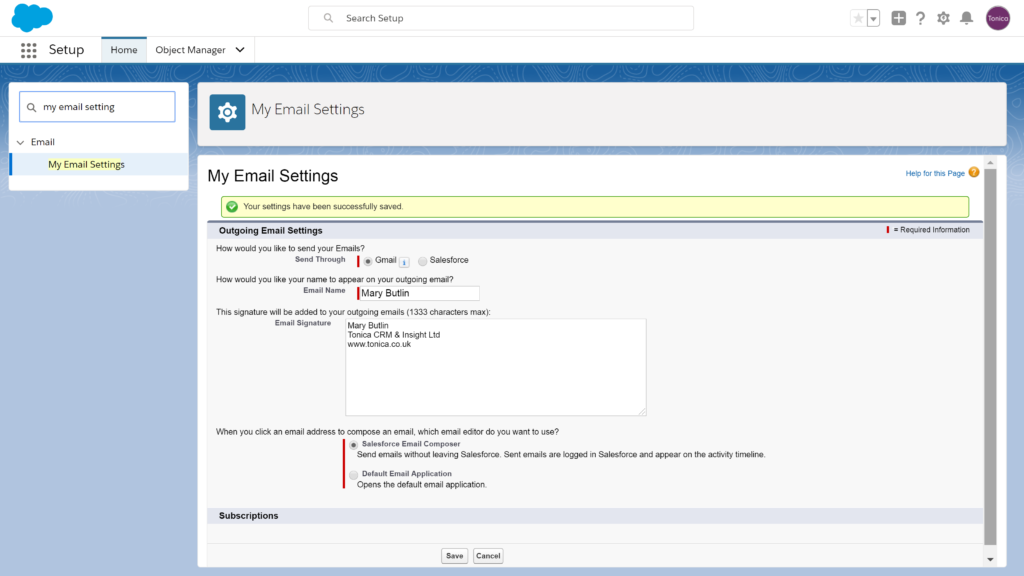
2) Secondly ensure that each user’s Email Settings choose Gmail as the sender
The second crucial step to this process is to make sure each user’s own ‘My Email Settings’ select Gmail as the sending mechanism.
3) What is the impact of sending via Gmail on sending email from Salesforce?
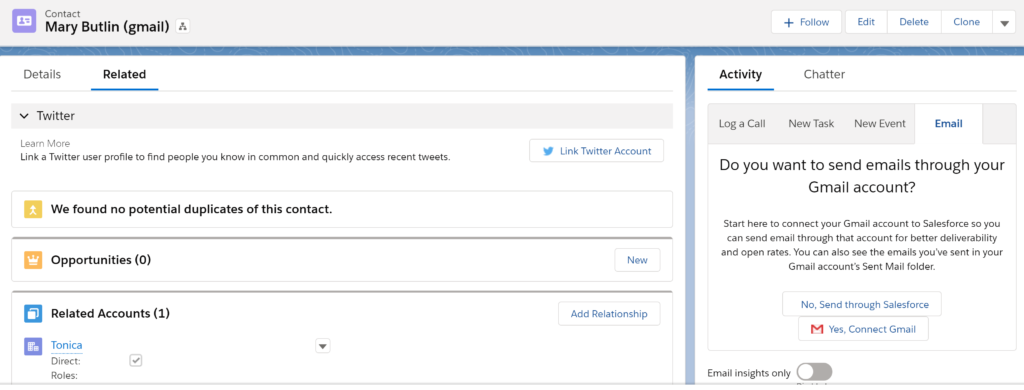
After you’ve changed your personal setting the first time you try to email a contact you’ll see that you have the option to send emails using your Gmail account and it will prompt you to connect to your Gmail.
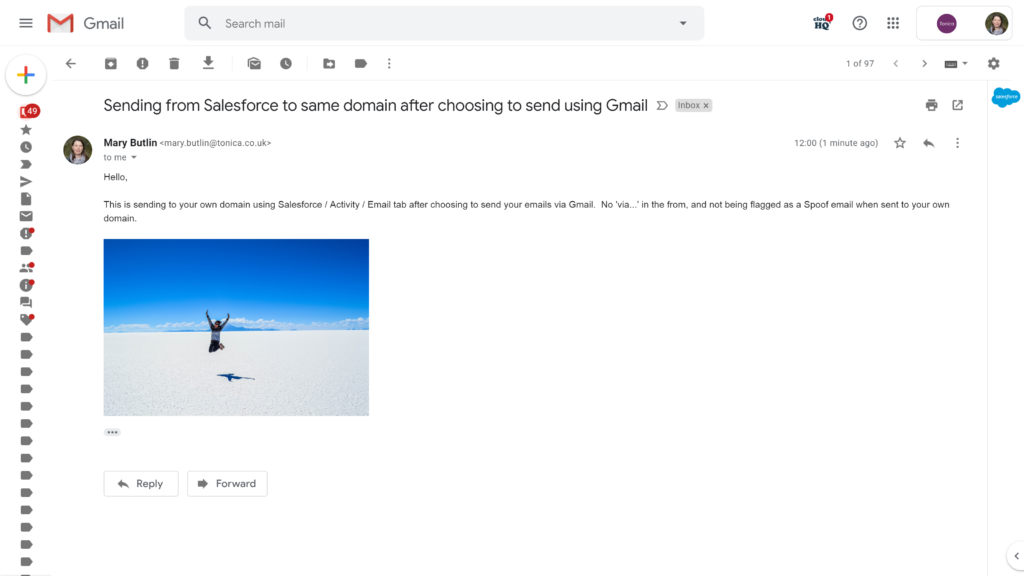
Finally, emails sent to your own domain aren’t flagged as Spoof:
And when sending to any domain there is no ‘via ….salesforce.com’ in the From field: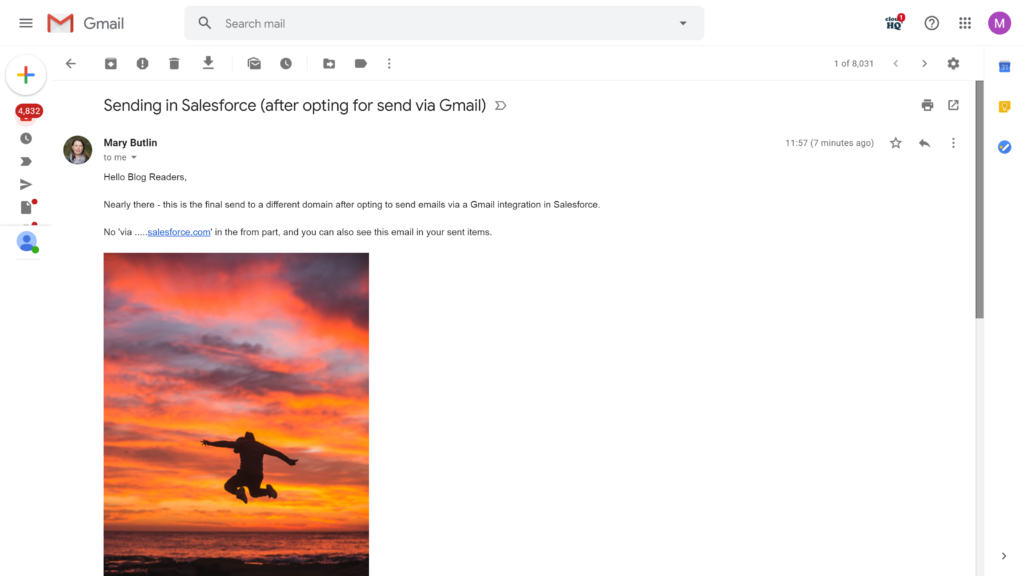
Are there any drawbacks?
We’ve noticed that when emails are triggered by Flow or Process Builder even with the above method, they still include the ‘via …. Salesforce.com’. If you’ve found a resolution to this, please do add a comment.
What have you found?
What have your experiences been with email deliverability? Have you found any solutions to the ‘via….’ issue for external emails or the ‘spoof’ message for emails to your own domain without sending via Gmail?
0 Comments on "How to improve Email Deliverability in Salesforce Lightning"